


 Italiano
 Français
 Deutsch
 Español
 Português
 Svenska
 Suomi
Suomi
Photographing Trees
Practical tips for capturing the beauty of trees in every season
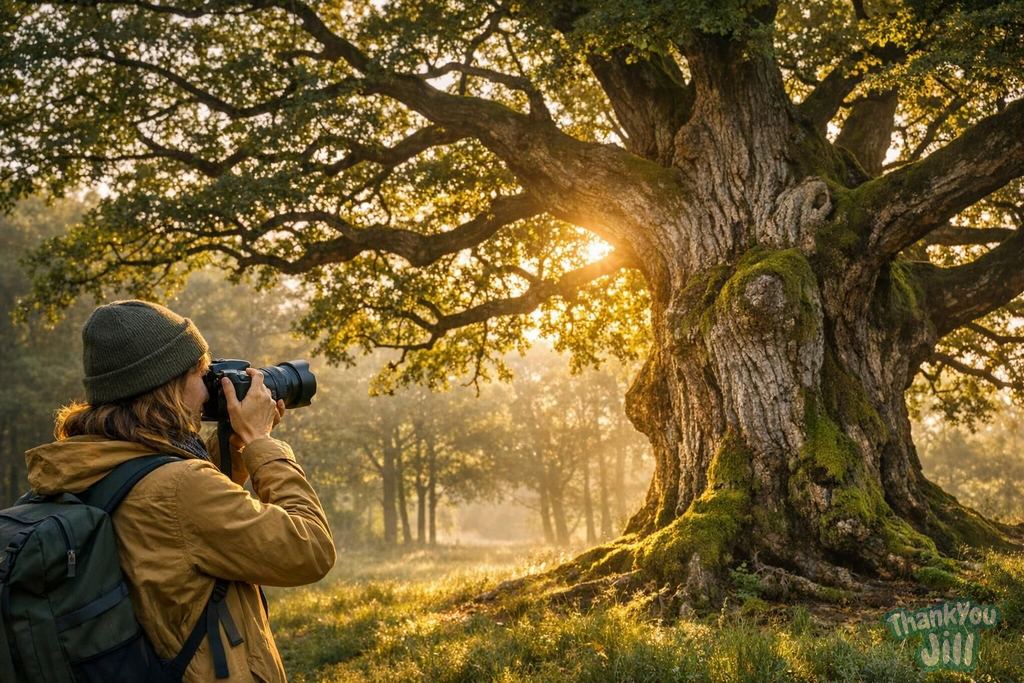
How many times have you photographed a tree that looked absolutely beautiful, only to have the photo turn out disappointing? A gray trunk against a gray background. A confused canopy without depth. A detail that was magnificent in person but came out blurry. Tree photography is an art that requires specific attention — and once you master it, every walk through the forest becomes a completely different visual experience.
Light: the secret to everything
In nature photography, light accounts for 70% of the result. The light on trees changes enormously throughout the day and across seasons, and understanding how to use it is the most important skill. Dawn and sunset light (the so-called "golden hour"): the light is warm, low, and raking. It enhances the texture of bark, makes dew-covered leaves shimmer, and creates long shadows that give three-dimensional depth to forest tree photographs. It's the best time to photograph monumental trunks and beech forests. Diffused light on cloudy days: soft, uniform, without harsh shadows — ideal for photographing fine details (leaves, lichen on bark, spring buds, galls). It eliminates excessive contrast that "burns" whites and "crushes" blacks in front-facing photographs. Backlighting: translucent leaves backlit (with the sun behind the subject) reveal the vein network spectacularly. It works best with thin leaves (beech, birch) that allow light to pass through. Misty autumn light: fog filters light and creates extraordinary atmospheric effects in conifer and beech forests. Photographs of trees in mist have an atmosphere impossible to replicate with other types of light.
Composition: how to frame a tree
The most common mistake in tree photography is placing the tree in the center of the frame, both horizontally and vertically. The result is almost always flat and uninteresting. Some more effective composition principles: The rule of thirds: imagine dividing the frame into 9 equal parts with two horizontal and two vertical lines. Position the tree's main trunk on one of the intersection points (not in the center). Leading lines: use horizontal branches as leading lines that draw the eye toward the center of interest. Rows of cypress trees, tree-lined roads, and roots extending toward the camera are powerful compositional guides. Vertical perspective: for large trees, position yourself at the base of the trunk and look upward with the camera tilted. The result — the trunk narrowing toward the sky, the canopy opening above you — is one of the most effective ways to convey a tree's grandeur. Detail against context: alternate between "wide" shots (entire tree in the landscape) and "detail" shots (bark at 20 cm, a bud, a fungus on a root). Combining both scales tells the tree's story much more completely than a wide view alone.
The best seasons and best subjects
Each season offers different and extraordinary photographic opportunities. Spring (March-May): cherry and sloe blossoms — an explosion of white on still-bare branches; the first translucent yellow-green beech leaves in April; the red buds of sycamore maple. Summer (June-August): dense canopy in full light; spider webs with morning dew; linden flowers; bark in the interplay of light and shadow in the forest. Autumn (September-November): the absolute best time for tree photography — the colors, low light, mist, fallen leaves. Winter (December-February): beech buds on snow; frost on branches; bare forest in black and white; redwood with orange bark against white snow.

Photographing a tree well forces you to really look at it — to understand where the light is, how the leaves move, where the bark is most beautiful. It's a visual education that transforms a walk into an active form of attention. Stop walking. Look. Wait for the light. Then shoot.
Equipment and practical techniques for photographing trees
- With a smartphone: most modern smartphones produce excellent quality photographs in good lighting conditions. The most useful modes: macro (for close-up details), portrait (to isolate a trunk from the background), panorama (for forests with large trees). The main trick: never use flash (it distorts colors and flattens textures), always use natural light.
- With a camera (mirrorless or DSLR): for fine details (bark, buds, lichen) use a 60-100 mm macro lens. For canopies and large trees, a 16-24 mm wide-angle allows you to include the entire height of the tree without excessive distortion. For forest scenes, a 24-70 mm covers most situations.
- A tripod for dawn magic: photographing a forest at dawn requires long exposure times (low light) — without a tripod, photos come out blurry. A compact tripod weighing 500-700 grams opens up a world of possibilities: long exposures for the silk effect of water in forest streams, HDR for extreme contrast between light and shadow in the forest, nighttime photographs of stars between branches.
- Close-up detail photography: get close to the bark to within 5-10 cm. With your smartphone's macro or portrait mode, the texture of oak bark, colorful lichen on beech bark, the galleries of bark beetles on a fir — these are photographic subjects of extraordinary beauty and great narrative power.
- With children — the seasonal photography project: give each child a smartphone (or use yours) and assign the task of photographing "the best of the forest today." Then, at home, look at the photographs together and discuss: what did you choose to photograph? Why? This photographic choice reveals what the child noticed, what struck them, what they saw. It's a remarkable opening into individual perception of nature.
Tree photography isn't an end in itself — it's a tool for attention. It forces you to slow down, to observe light, to choose a viewpoint, to wait for the right moment. All these actions transform an ordinary walk into an experience of presence in the natural world. And the photographs that result are the document of that presence — proof that you were there, that you saw, that you chose to stop.
Frequently Asked Questions
What is the best time of day to photograph trees and why?
The best time is during the golden hour, at dawn or sunset, when the light is warm, low, and raking. This light enhances bark texture, makes leaves shimmer, and creates long shadows that give three-dimensional depth to tree photographs.
How do you choose the ideal composition for photographing a tree without getting flat images?
Avoid placing the tree in the center. Use the rule of thirds by positioning the trunk on an intersection point, take advantage of leading lines like branches or roots to direct the eye, and try vertical perspective by tilting the camera upward to convey the tree's grandeur.
What lenses and equipment are recommended for photographing trees and their details?
For fine details use a 60-100 mm macro lens, for large canopies a 16-24 mm wide-angle, and for general situations a 24-70 mm. A tripod is useful for long exposures at dawn or in low light conditions, while a smartphone works well with macro, portrait, and panorama modes.
How does tree photography change across different seasons and what are the main opportunities?
In spring you photograph blossoms and buds, in summer the dense canopy and spider webs with dew, in autumn warm colors, low light and mist create unique atmospheres, while in winter you capture buds on snow, frost on branches, and bare forests in black and white.
Latest News
Comments
No comments yet. Be the first!
Leave a comment